Keycloak Provider
Follow these steps to configure Ngrok for your Keycloak application:
1. Install Ngrok
- Go to the Ngrok Windows Download Page.
- Download and extract the ngrok executable on your system.
- Sign up for an account on the ngrok website, or log in if you already have one.
2. Configure Ngrok Authtoken
-
Once logged in, go to your ngrok dashboard to find your authtoken.
-
Copy the authtoken to your clipboard.
-
Open a Command Prompt (
cmd) on your computer. -
Run the following command, replacing
<your_authtoken>with the token you just copied:ngrok config add-authtoken <your_authtoken>(This will save the authtoken to your configuration file, typically located at
C:\Users\<YourUsername>\AppData\Local\ngrok\ngrok.yml)
3. Start Ngrok Tunnel
To expose your local Keycloak instance to the internet (assuming it runs on port 8080), run the following command in the Command Prompt:
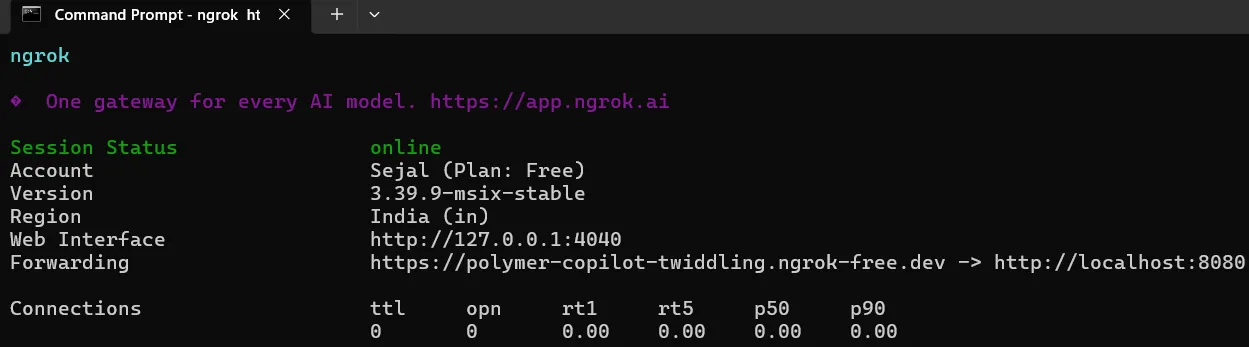
ngrok http 80804. Set Up Keycloak using Docker
-
Create a new folder on your computer (e.g.,
Keycloak) and open it. -
Inside this folder, create a new file named
docker-compose.ymland paste the following configuration:version: '3.8' services: keycloak: image: quay.io/keycloak/keycloak:25.0.2 command: start-dev environment: - KEYCLOAK_ADMIN=admin - KEYCLOAK_ADMIN_PASSWORD=admin # Replace the URL below with your current ngrok URL - KC_HOSTNAME=https://polymer-copilot-twiddling.ngrok-free.dev - KC_PROXY=edge - KC_HTTP_ENABLED=true ports: - "8080:8080" volumes: - ./keycloak_data:/opt/keycloak/data -
In the file above, ensure you update the
KC_HOSTNAMEvariable with the exact forwarding URL you received from the Ngrok command prompt window. -
Ensure you have Docker installed and running on your system.
-
Open a Command Prompt in the folder where you created the
docker-compose.ymlfile and run the following command to start Keycloak:docker compose up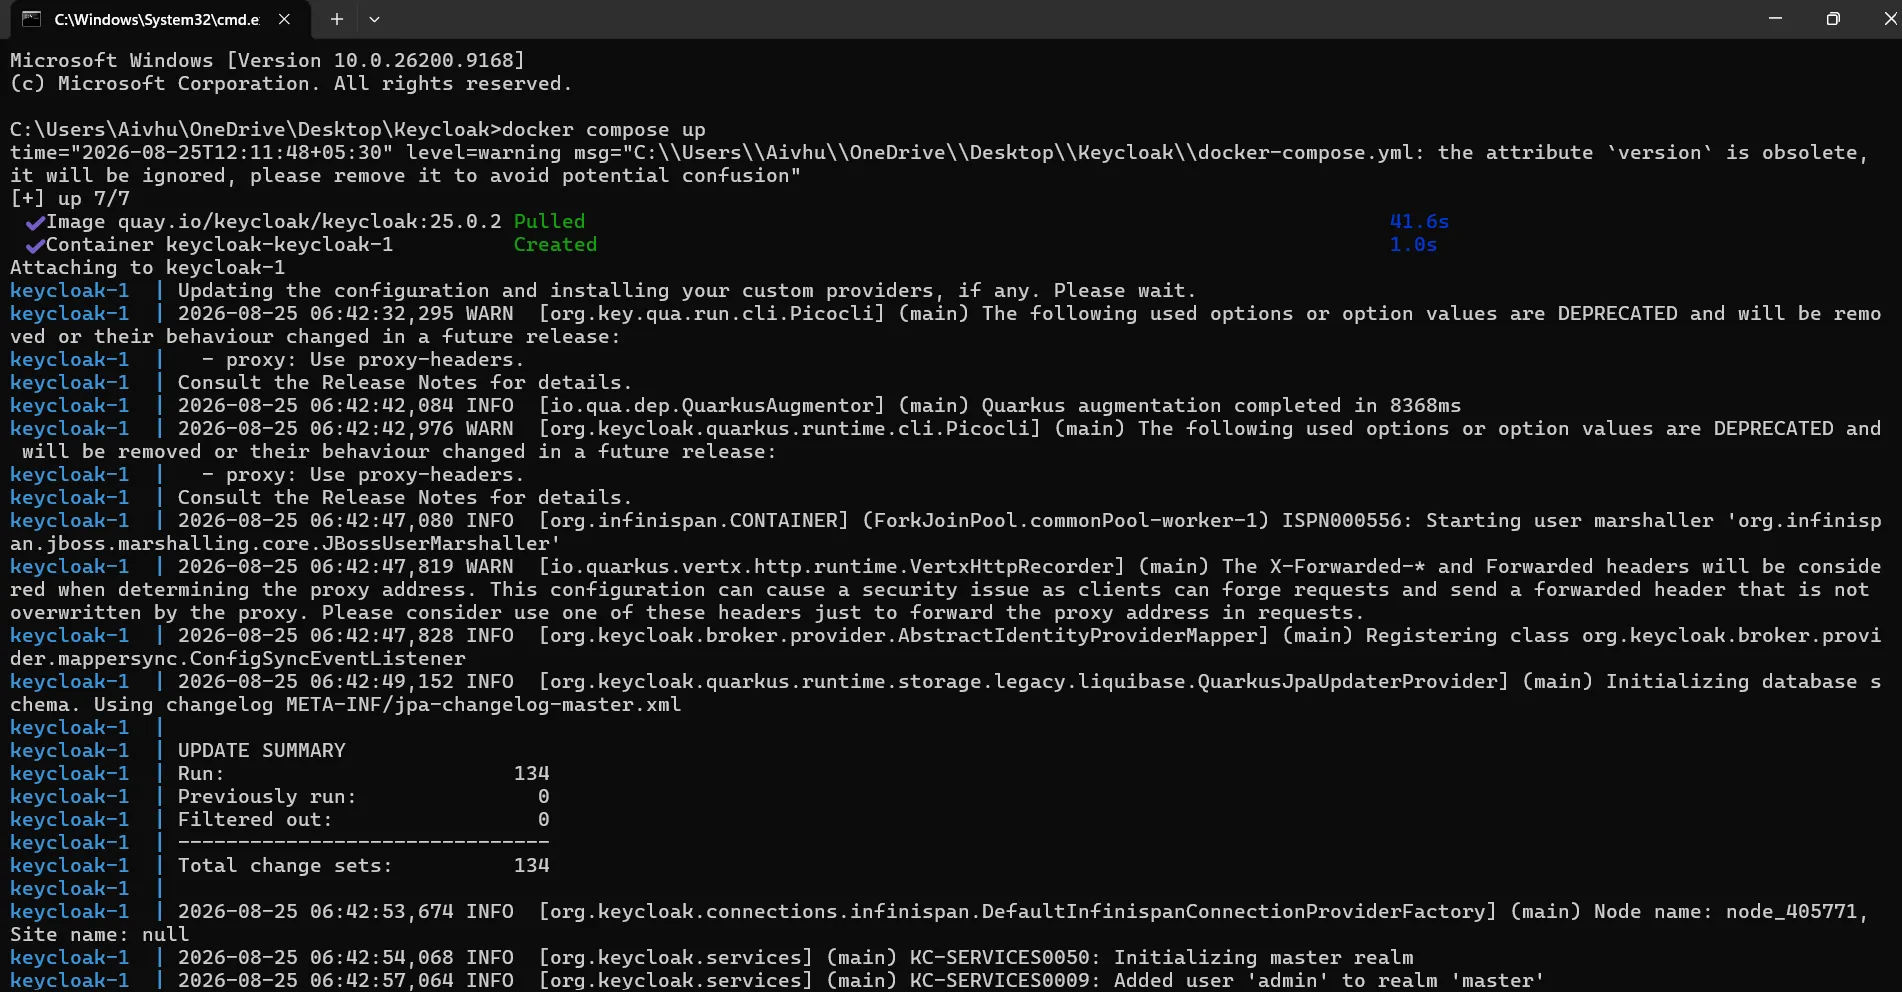
5. Access the Keycloak Administration Console
-
Open your web browser and navigate to
http://localhost:8080(or use your Ngrok URL directly). -
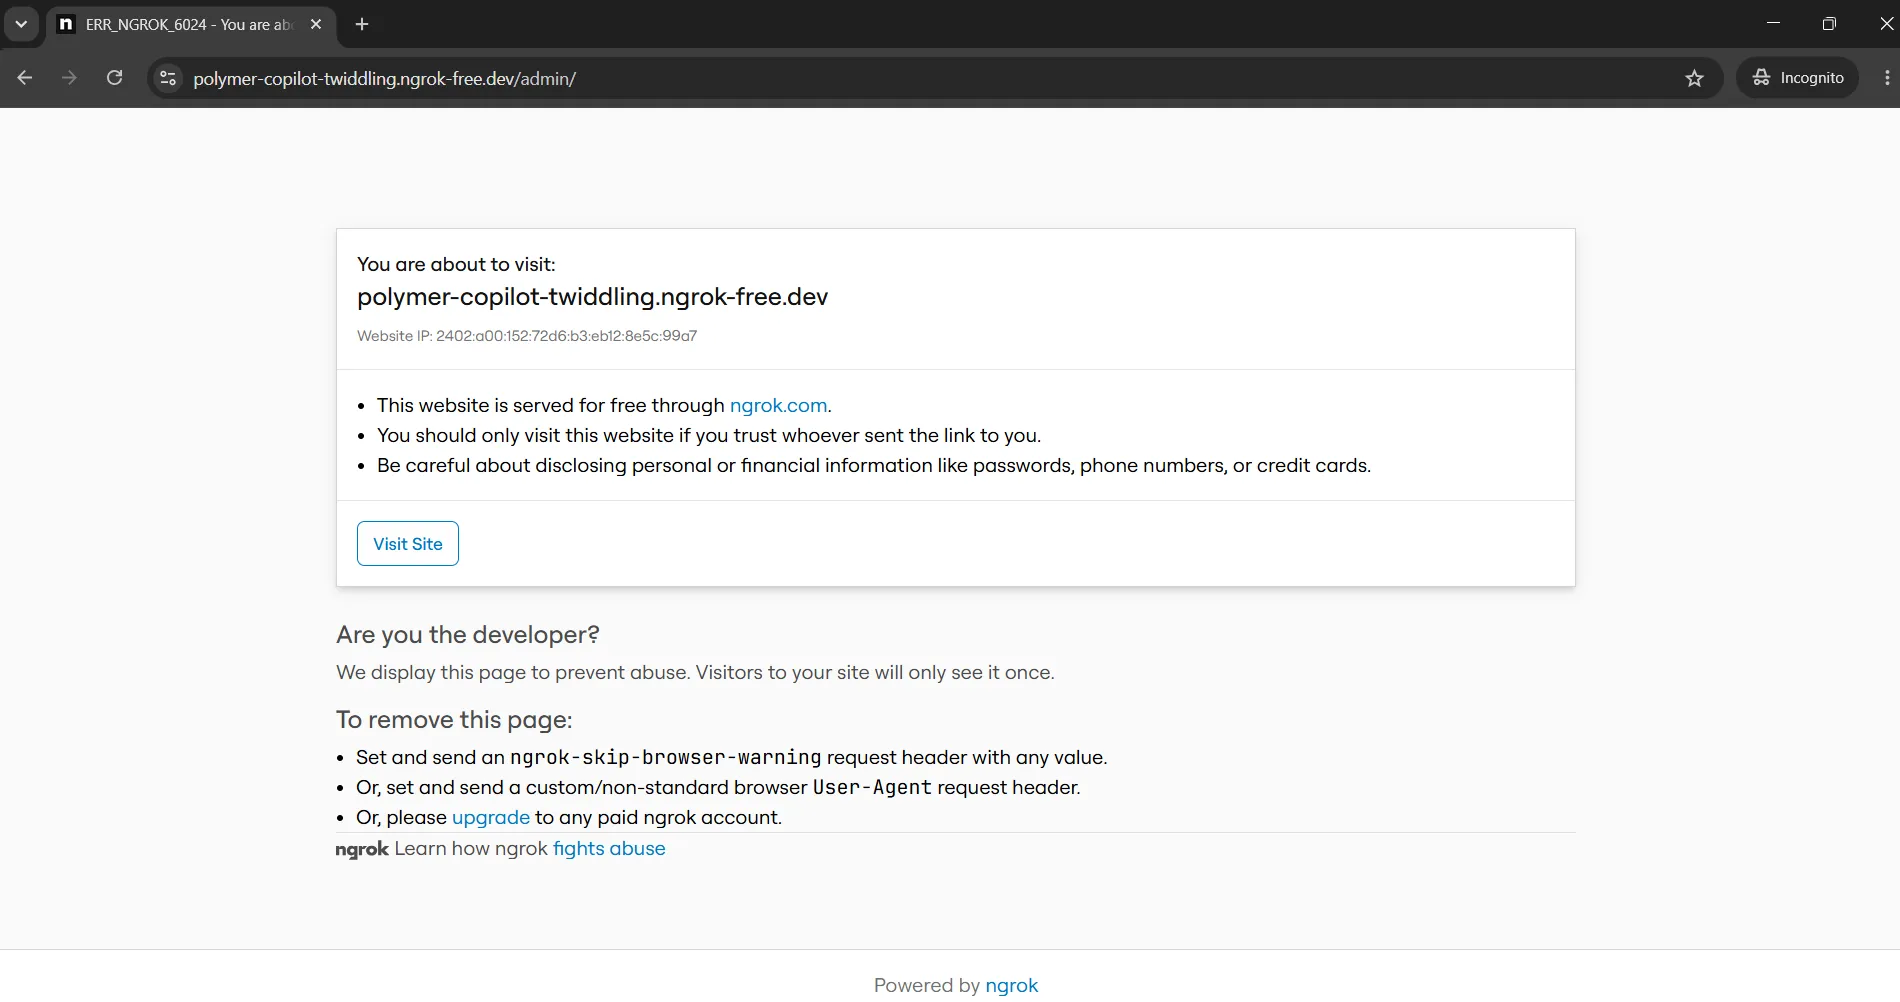
If you are using the Ngrok URL for the first time, you might see an Ngrok warning page. Click on the Visit Site button to proceed.
-
On the Keycloak sign-in page, enter your configured username and password (e.g.,
admin/admin) and click Sign In.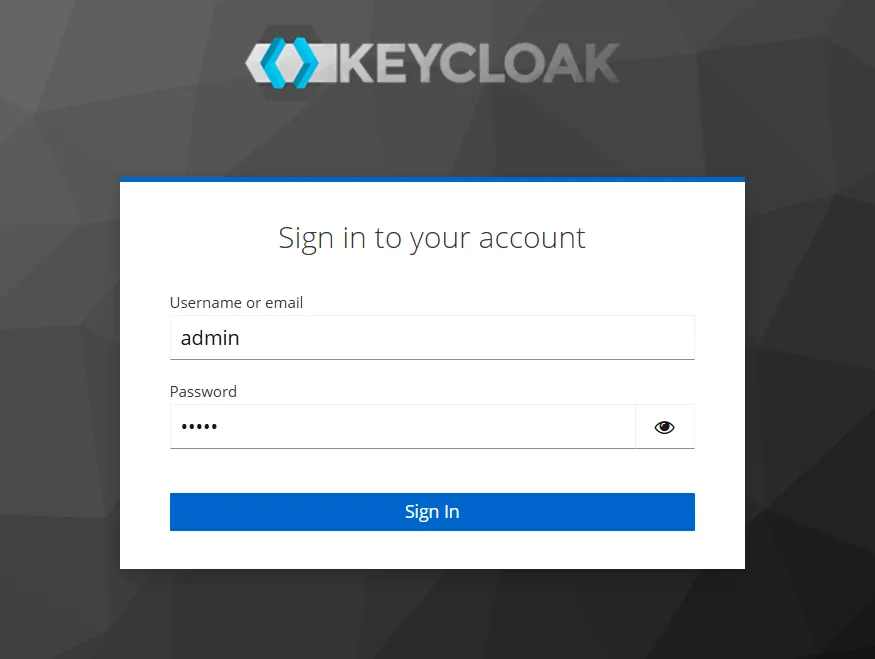
-
You should now be successfully logged in and redirected to the Keycloak Administration Console!
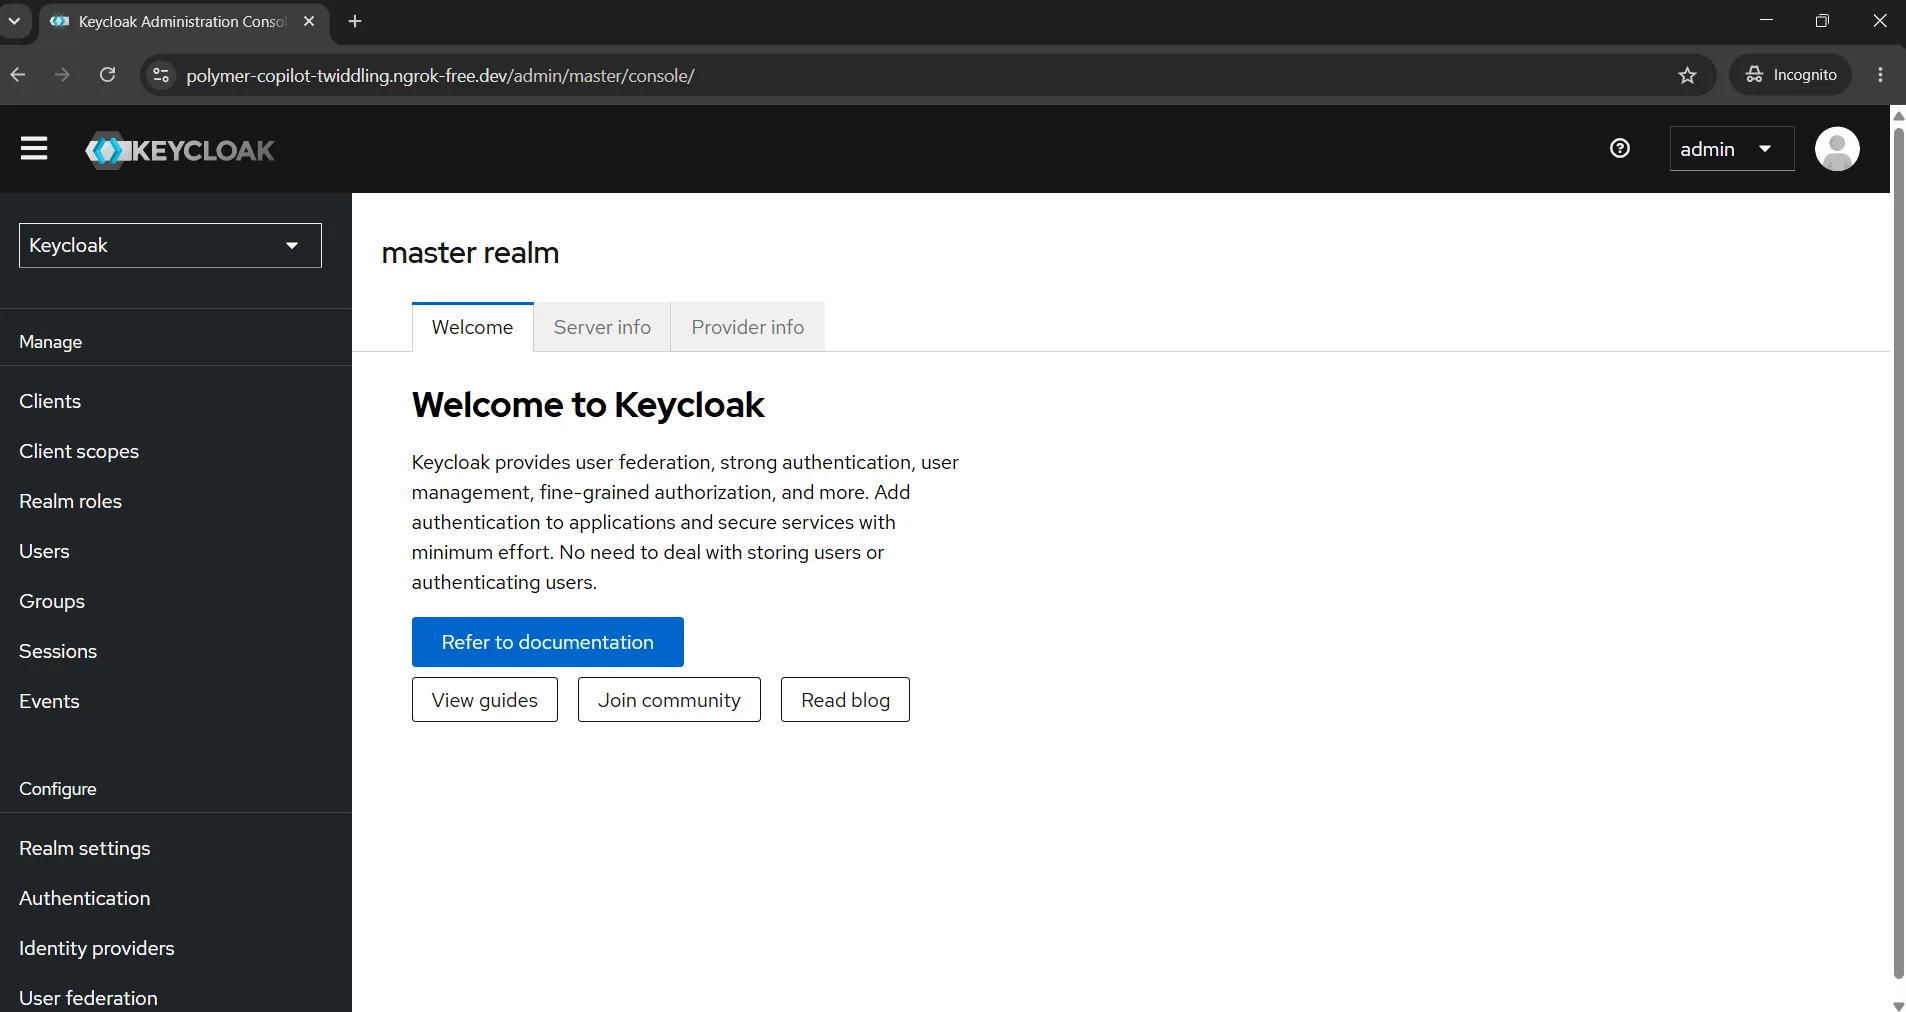
6. Create a New Realm
-
In the Keycloak Administration Console, click on the Keycloak dropdown menu located in the top-left corner.
-
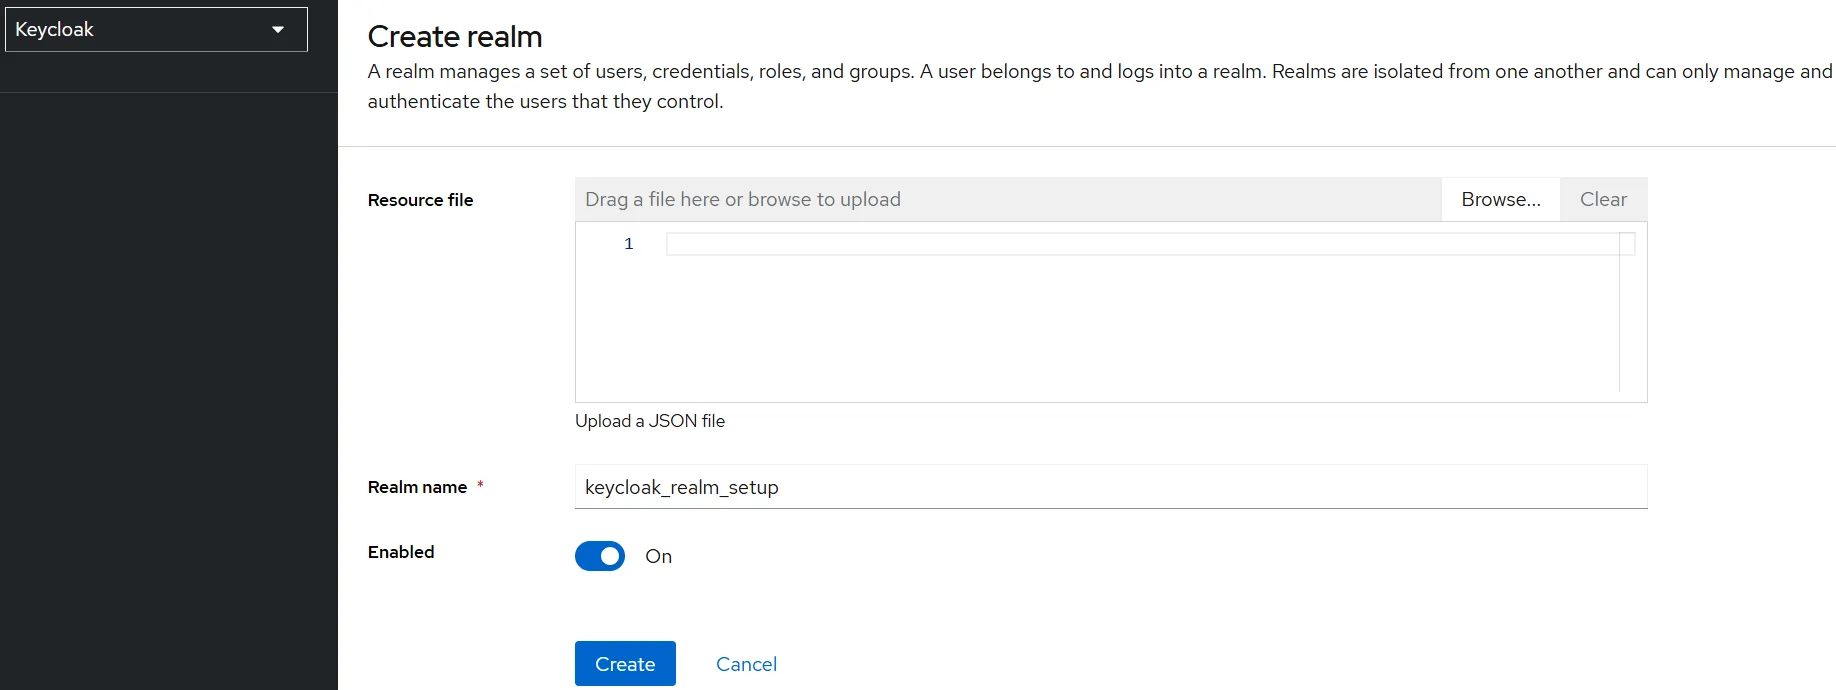
Click the Create realm button.
-
On the Create realm page, provide a Realm name (e.g.,
keycloak_realm_setup). -
Ensure the Enabled toggle is turned on.
-
Click on the Create button to finish setting up your new realm.
-
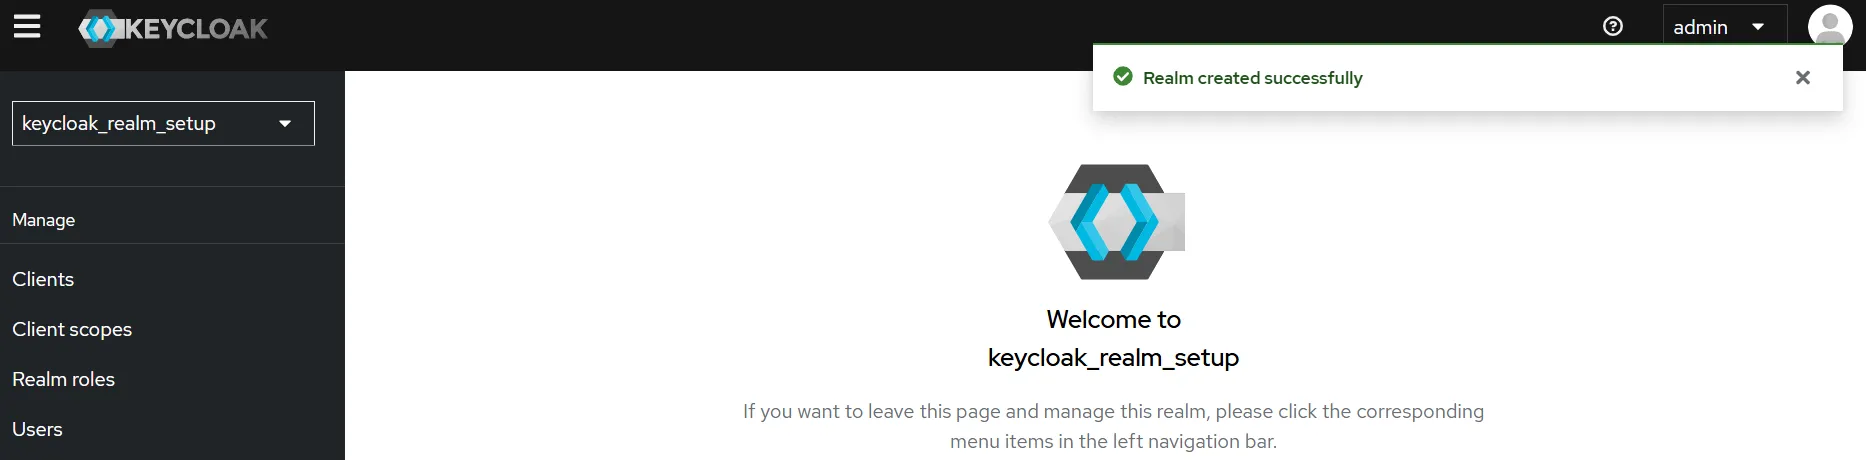
A success popup message will appear confirming the realm creation, and you will be greeted with a “Welcome to [Your Realm Name]” screen.
-
Additionally, you will see that your new realm (e.g., keycloak_realm_setup) is now automatically selected in the realm dropdown menu.
7. Create a New Client
-
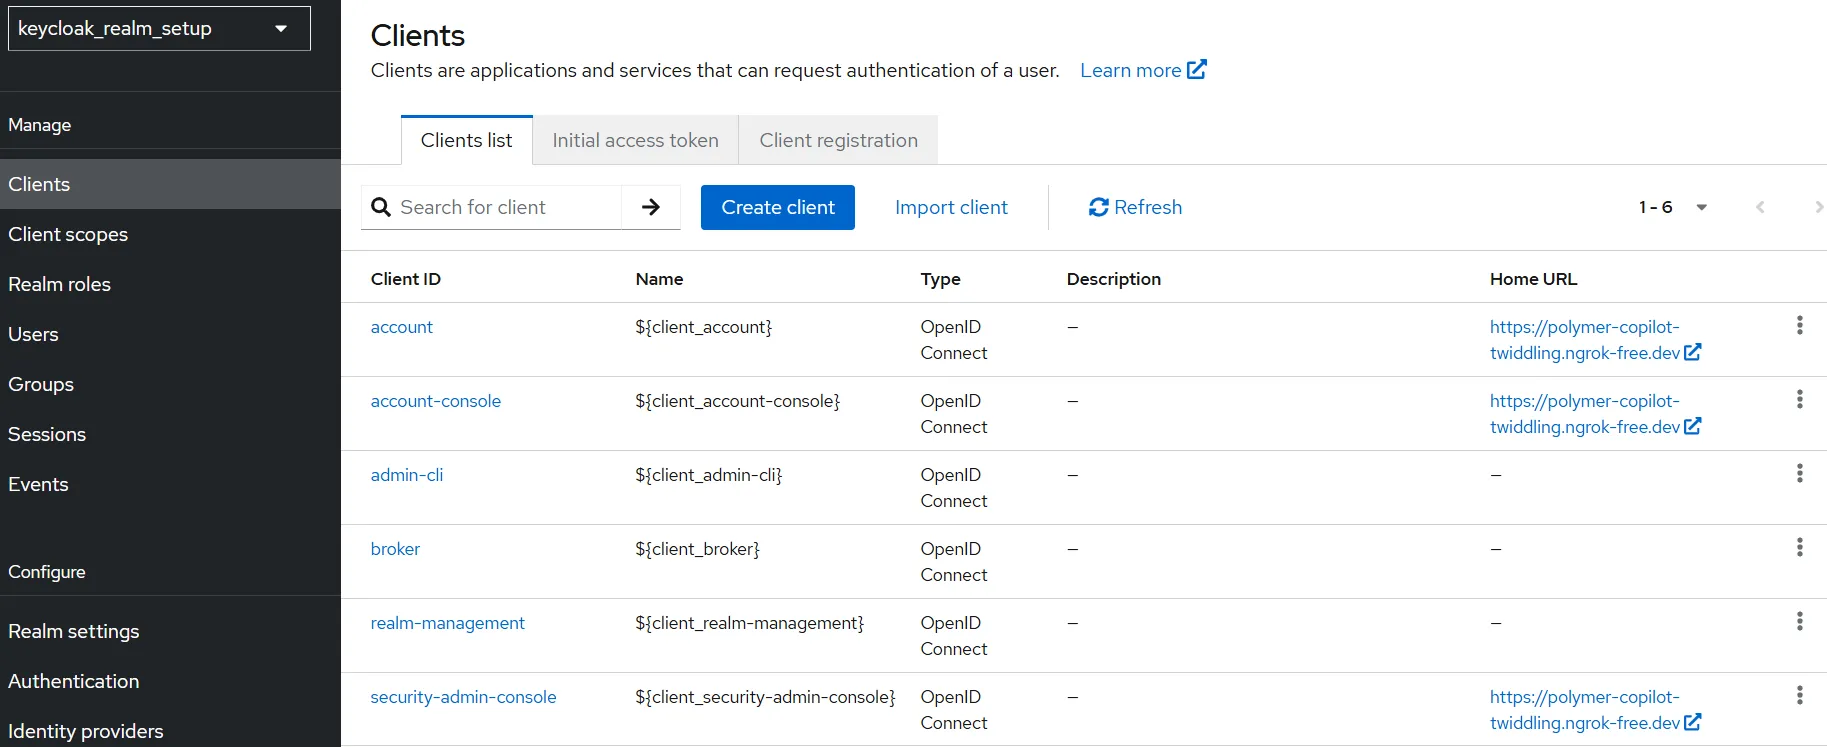
In the left-hand navigation menu of your new realm, click on Clients, then click the Create client button.
-
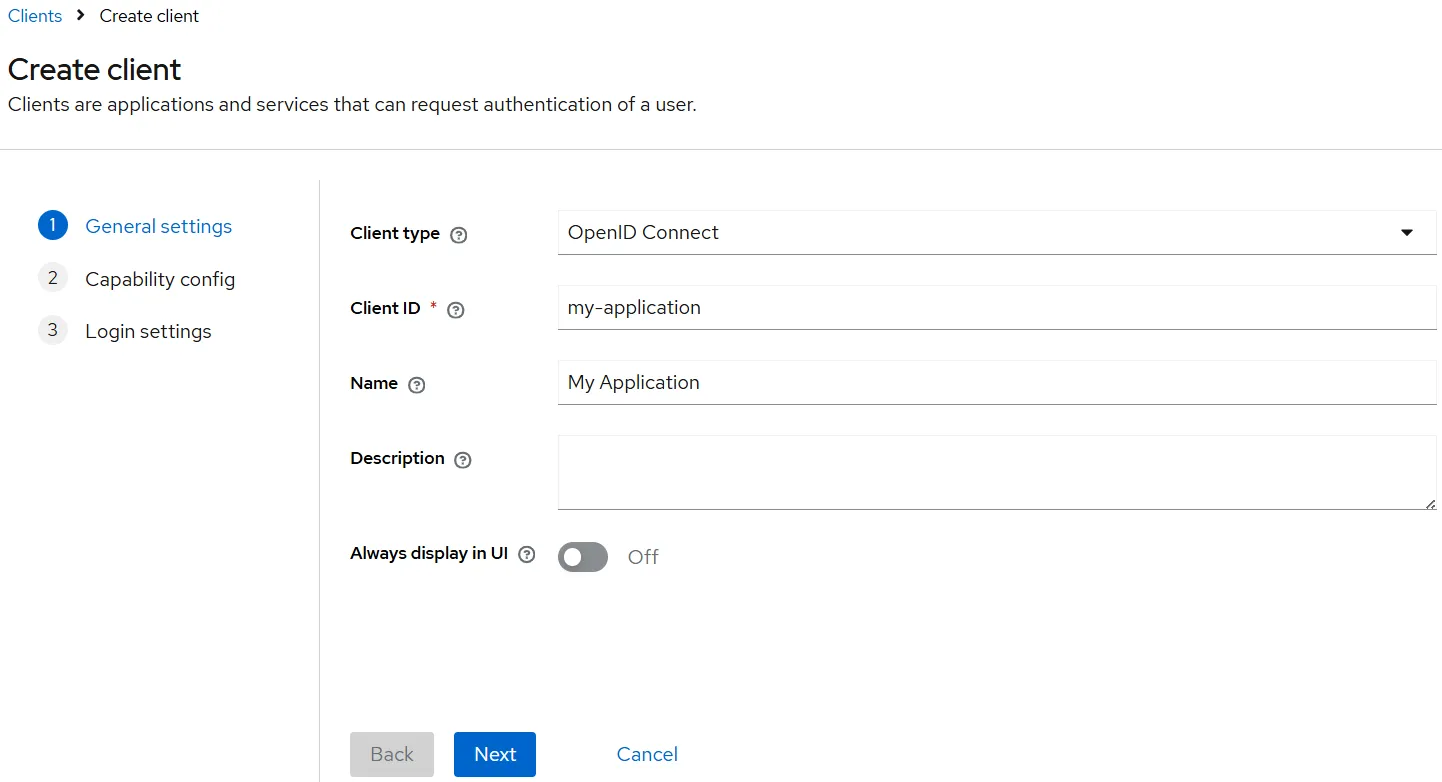
On the General settings step, configure the following:
- Client type:
OpenID Connect - Client ID:
my-application(or your preferred ID) - Name:
My Application
Once filled out, click Next.
- Client type:
-
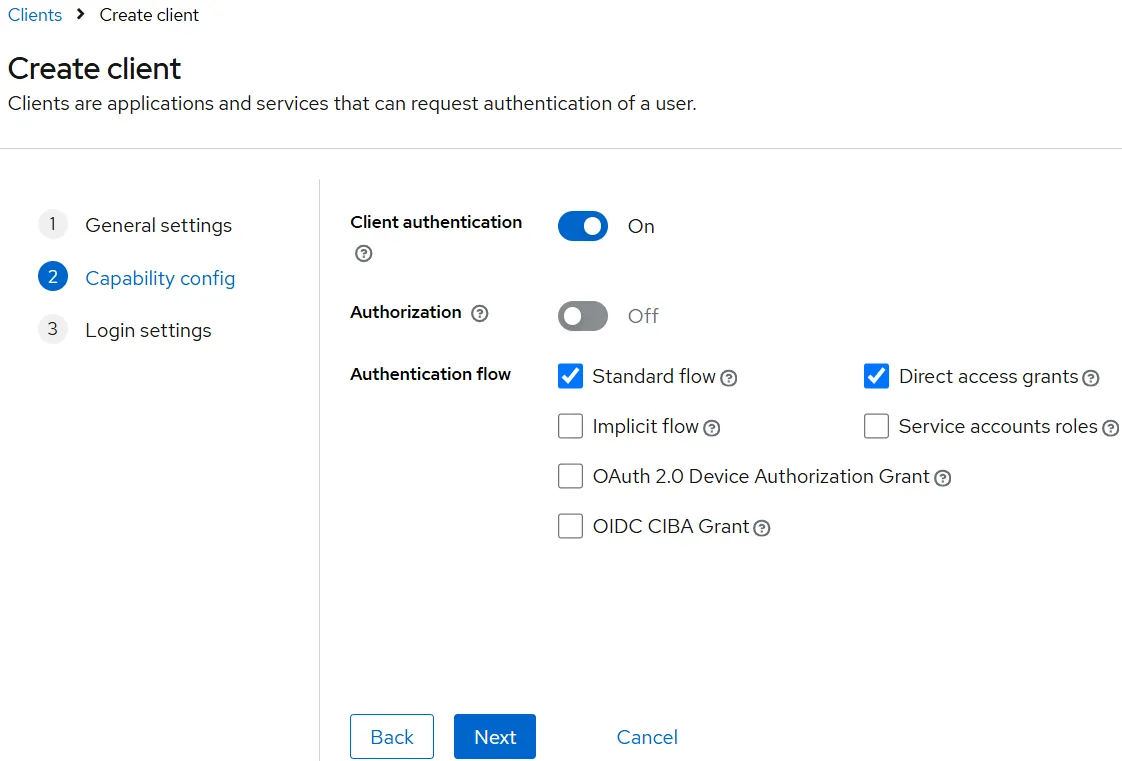
On the Capability config step, configure the following:
- Toggle Client authentication to On.
- Under Authentication flow, ensure Standard flow and Direct access grants are checked.
Once configured, click Next.
-
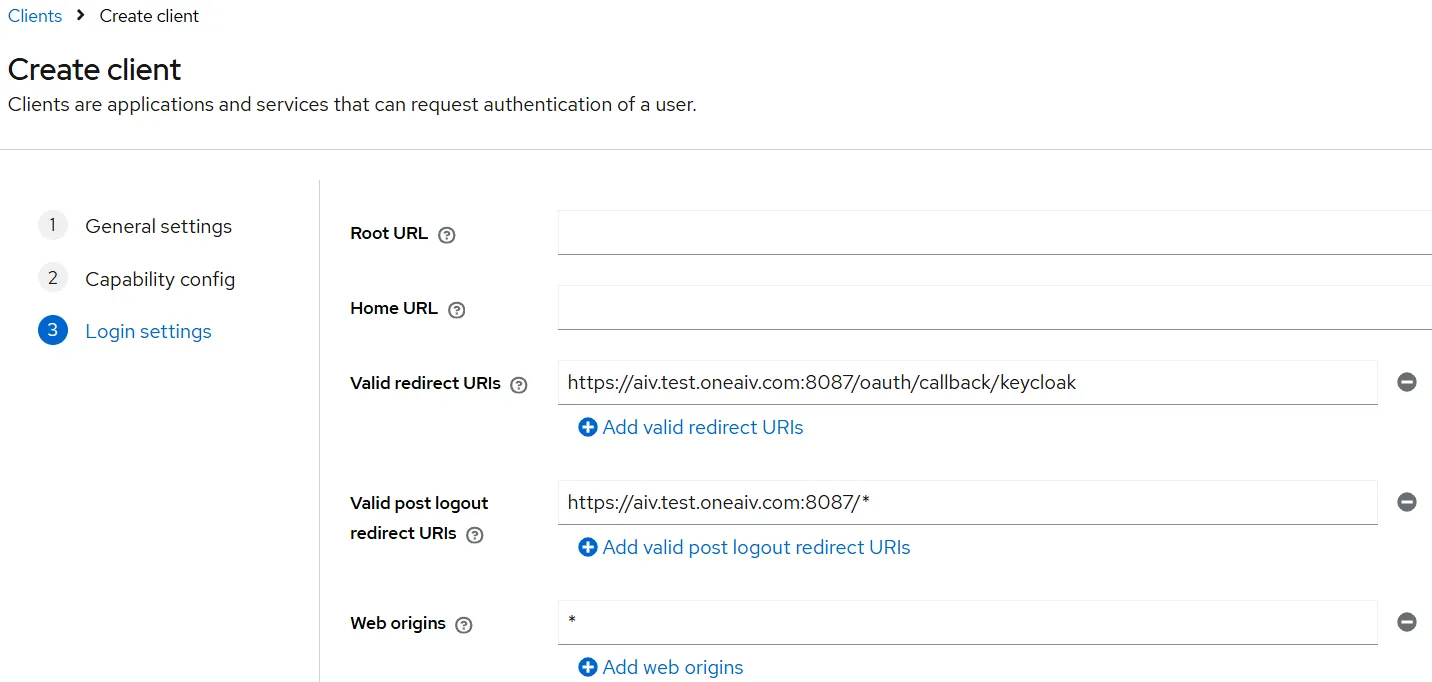
On the Login settings step, configure the following:
- Valid redirect URIs:
https://aiv.test.oneaiv.com:8087/oauth/callback/keycloak - Valid post logout redirect URIs:
https://aiv.test.oneaiv.com:8087/* - Web origins:
*
Click Save to complete the client creation.
- Valid redirect URIs:
-
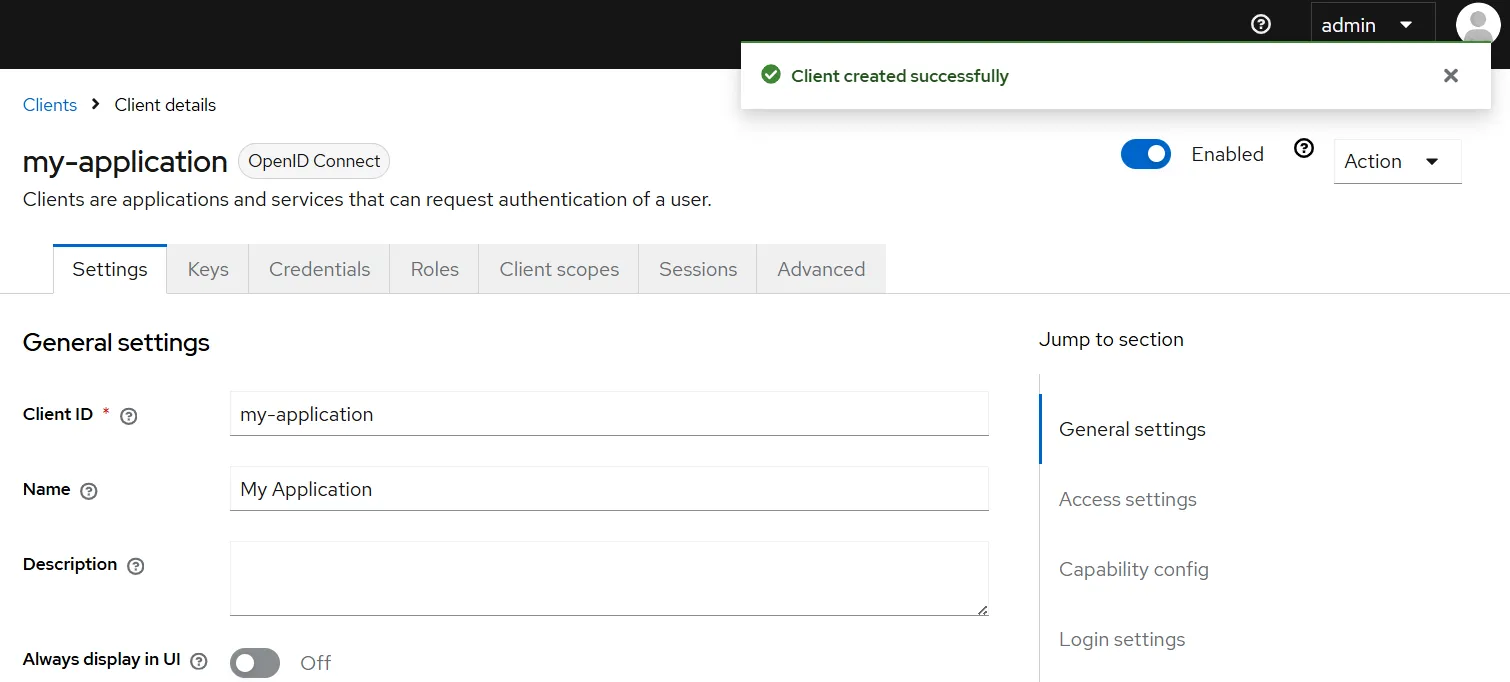
A success popup message will appear confirming the client creation, and you will be directed to the client details page.
8. Create a New User
-
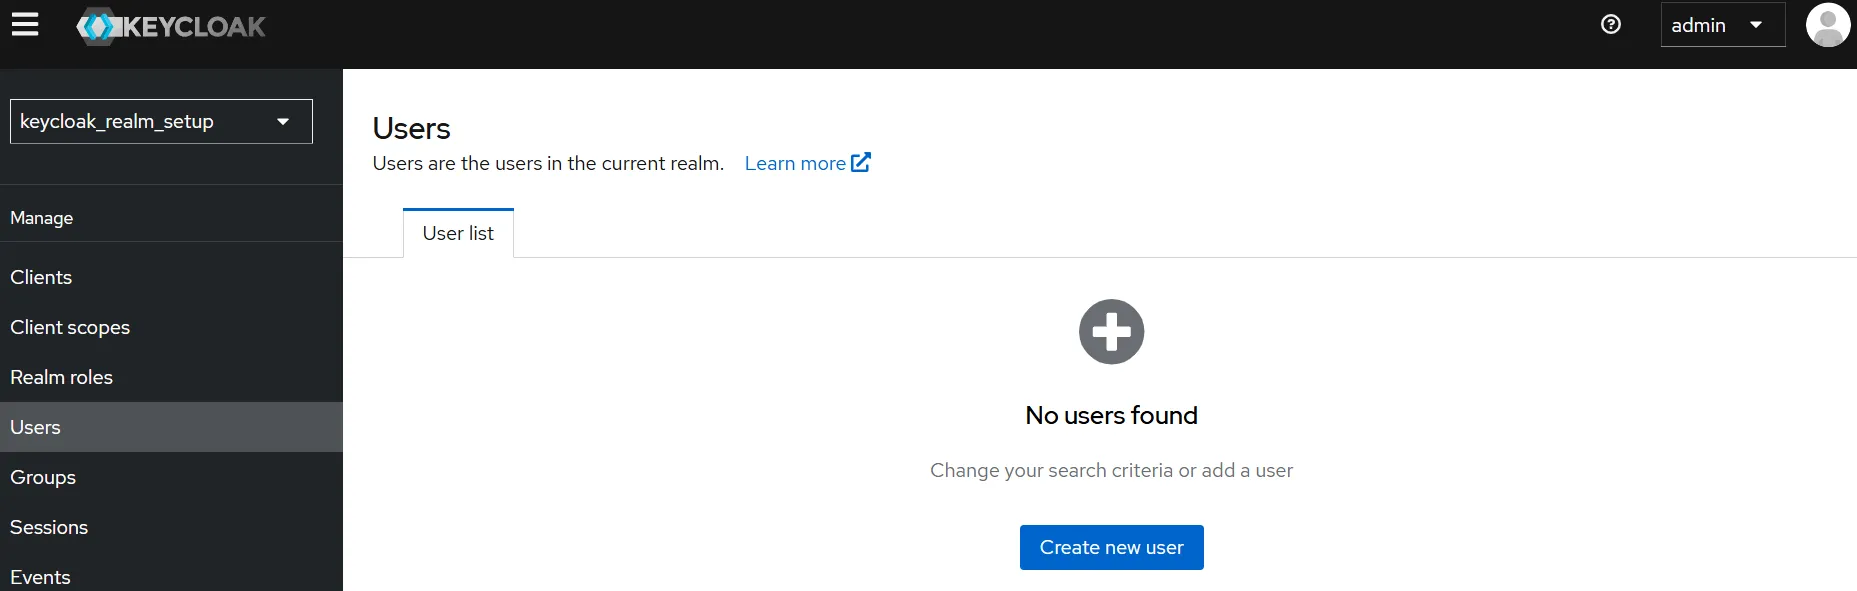
In the left-hand navigation menu, click on Users.
-
Click the Create new user button (if the list is empty, it will be located in the center of the screen).
-
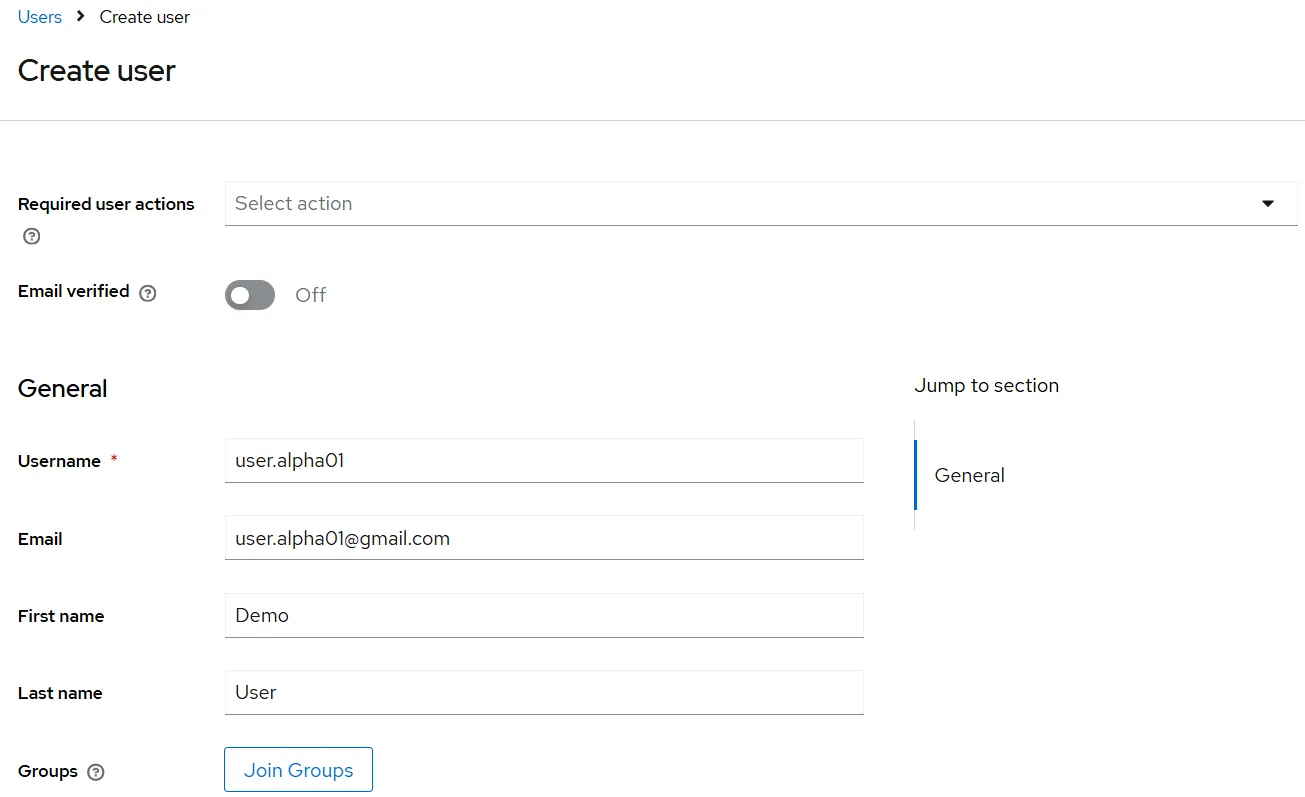
On the Create user page, fill in the user details. For example:
- Username:
user.alpha01 - Email:
user.alpha01@gmail.com - First name:
Demo - Last name:
User
- Username:
-
Click on the Create button at the bottom of the form to add the new user.
-
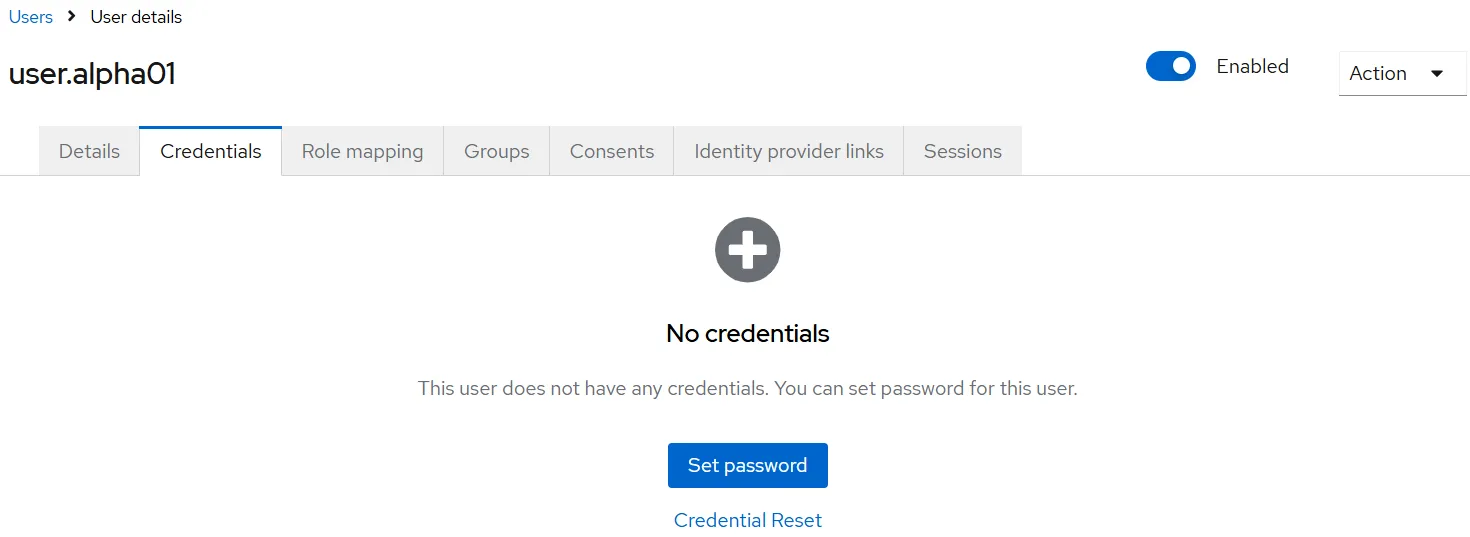
A success popup message will appear confirming the user creation, and you will see the user’s details page.

-
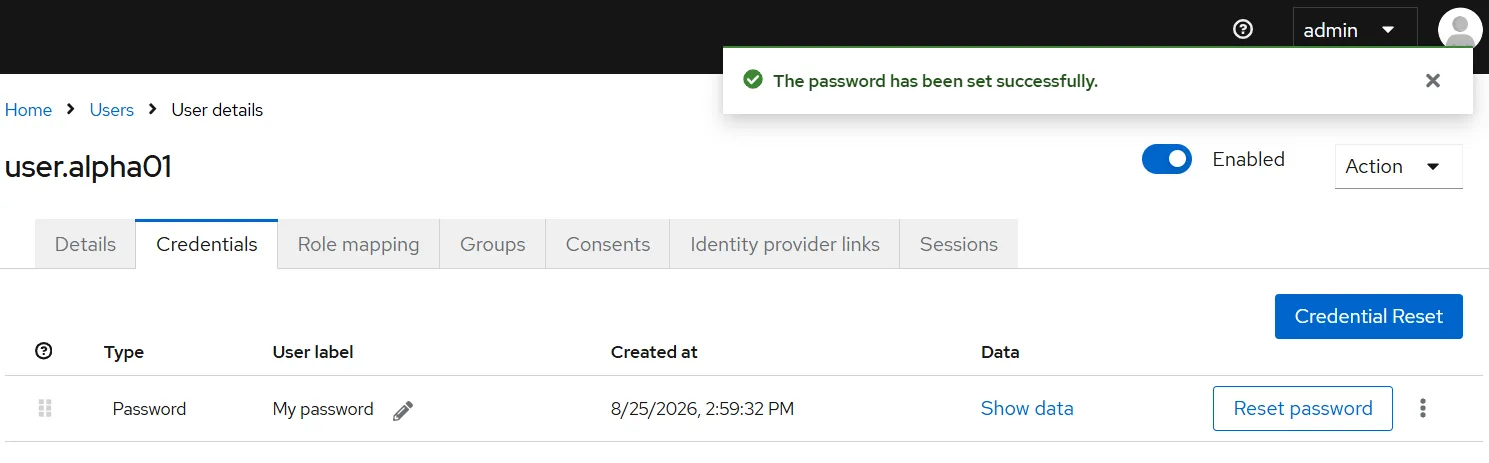
Click on the Credentials tab at the top of this page, then click the Set password button.
-
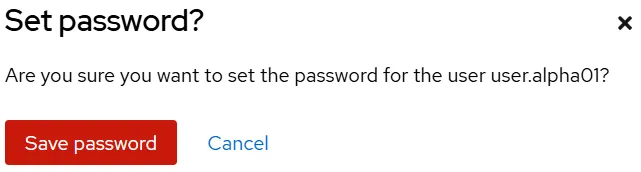
A dialog will appear to set the password. Fill out the desired password and click on the Save password button.
-
You will see a success notification at the top of the screen confirming that the password has been set successfully.
9. Configure Authentication in AIV
-
Log in to your AIV application.
-
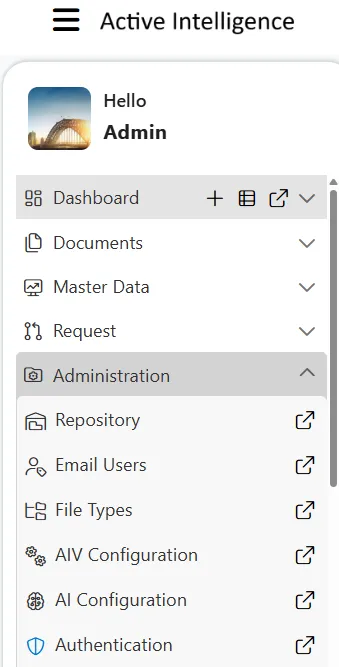
Click on the Hamburger menu (three horizontal lines) in the top-left corner to open the sidebar.
-
Expand the Administration section and click on Authentication.
-
The Universal Auth Administration page will open. From the left-hand directory menu, select Providers.
-
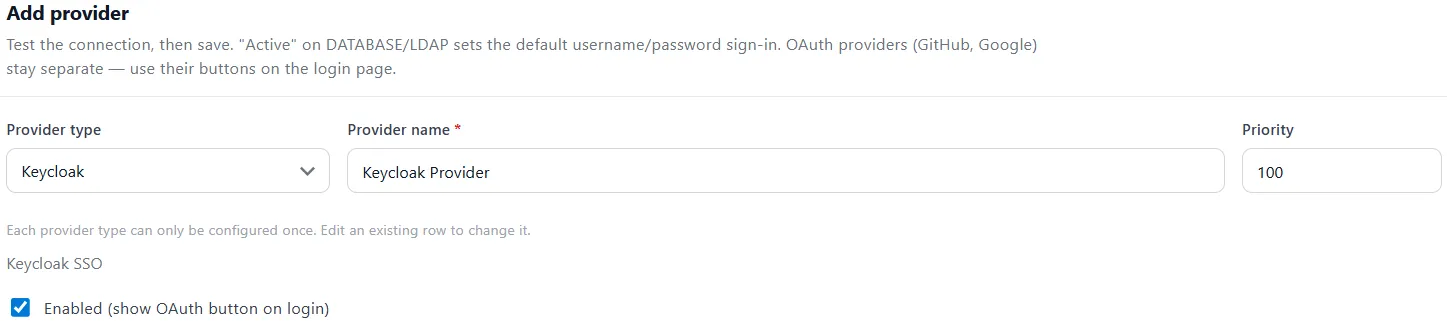
Under the Add provider section, locate the Provider type dropdown. By default, it will be set to Database (already configured).
-
Click the dropdown and select Keycloak.
-
Fill in the following details for the new provider:
-
Provider name:
Keycloak Provider(or your preferred name) -
Priority:
100 -
Make sure to check the box for Enabled (show OAuth button on login).
-
-
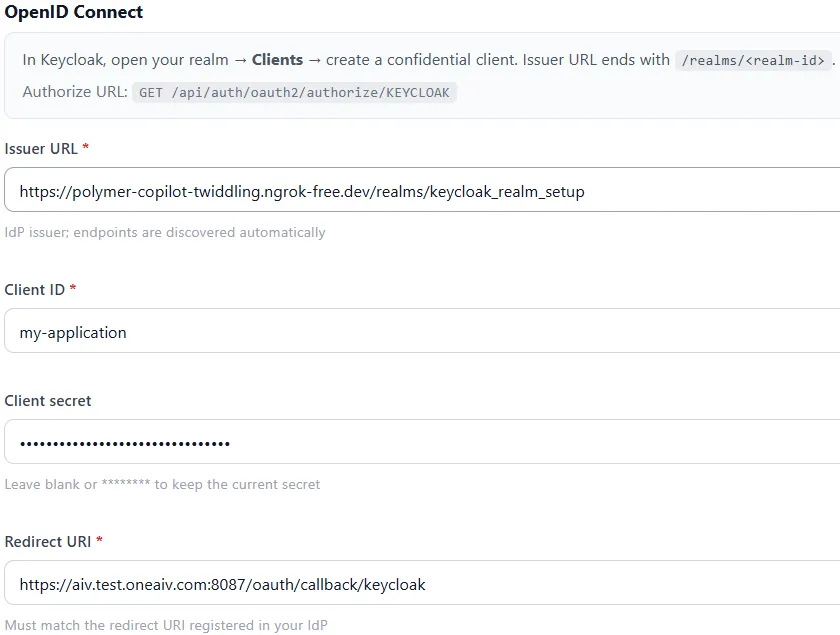
Scroll down to the OpenID Connect section and fill in the following details:
-
Issuer URL: Enter your Ngrok forwarding URL appended with
/realms/<realm-name>(e.g.,https://polymer-copilot-twiddling.ngrok-free.dev/realms/keycloak_realm_setup).- How to find it: You can find your base Ngrok URL in your Ngrok command prompt window. The realm name is the one you created earlier (e.g.,
keycloak_realm_setup), which you can verify from the Keycloak top-left dropdown.
- How to find it: You can find your base Ngrok URL in your Ngrok command prompt window. The realm name is the one you created earlier (e.g.,
-
Client ID: Enter the Client ID you created in Keycloak (e.g.,
keycloak_realm_setup). -
Client secret: Paste the Client Secret generated from your Keycloak client.
- How to find it: Go to your Keycloak Administration Console. Navigate to Clients, select your client (e.g.,
keycloak_realm_setup), click on the Credentials tab, and copy the Client Secret.
- How to find it: Go to your Keycloak Administration Console. Navigate to Clients, select your client (e.g.,
-
Redirect URI: Enter the callback URL for your AIV instance (e.g.,
https://aiv.test.oneaiv.com:8087/oauth/callback/keycloak).-
How to find it: This is the exact same URL you entered in the Keycloak Client Valid redirect URIs setting during the client creation step.
-
-
-
Click on the Add provider button to save.
-
A success popup message will appear, and you will now see your newly created Keycloak authentication provider listed as Active in the Provider configuration list.

10. Test Keycloak Authentication
-
Log out of your AIV application.
-
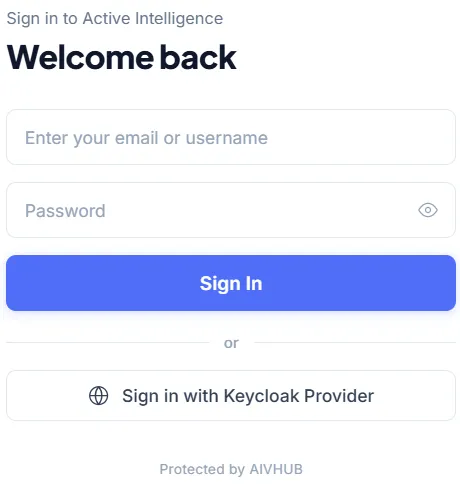
Navigate to the AIV login screen. You will now see a Sign in with Keycloak Provider button.
-
Click on the button to securely sign in using your Keycloak credentials.
-
You will be redirected to the Keycloak sign-in page for your realm. Enter the username and password you created earlier (e.g.,
user.alpha01) and click Sign In.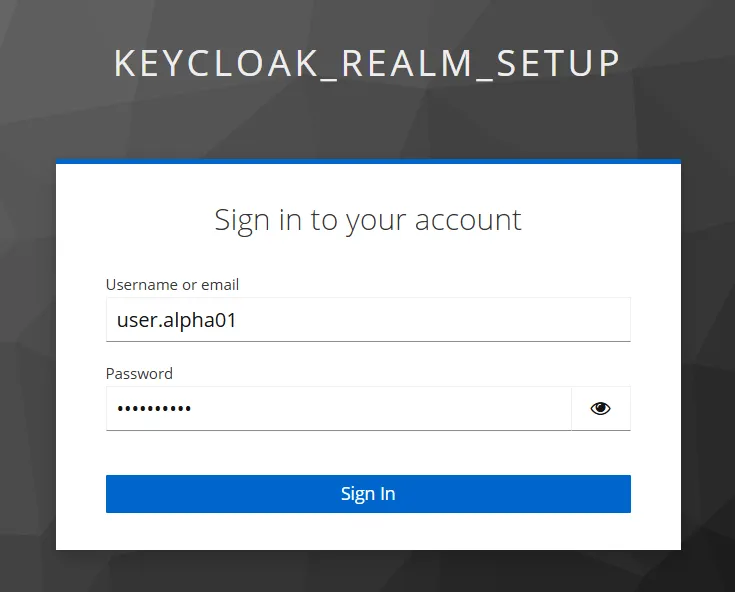
-
Upon successful authentication, you will be redirected back to the AIV dashboard, and you will see your username (e.g.,
user.alpha01) displayed in the top-right corner.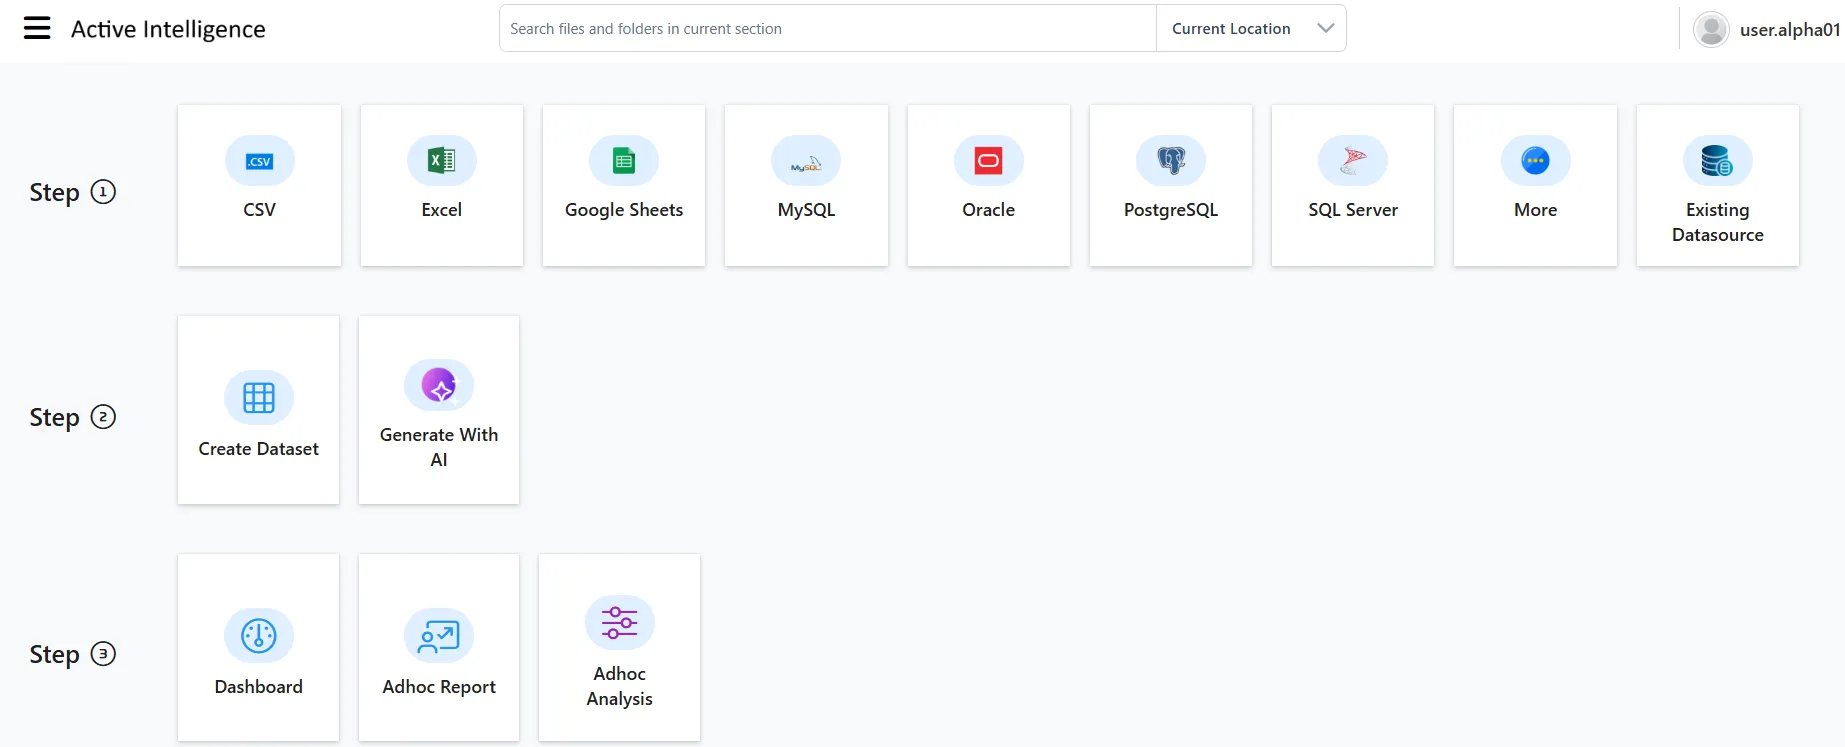
Summary
By completing these steps, you have successfully installed Ngrok, started a secure tunnel, spun up a local Keycloak instance via Docker, accessed its Administration Console, created a new realm, configured a new OpenID Connect client, and added a new user. You can now use the provided public Ngrok URL to access your local Keycloak instance from anywhere, which is especially useful when configuring external OAuth2 providers or Webhooks.